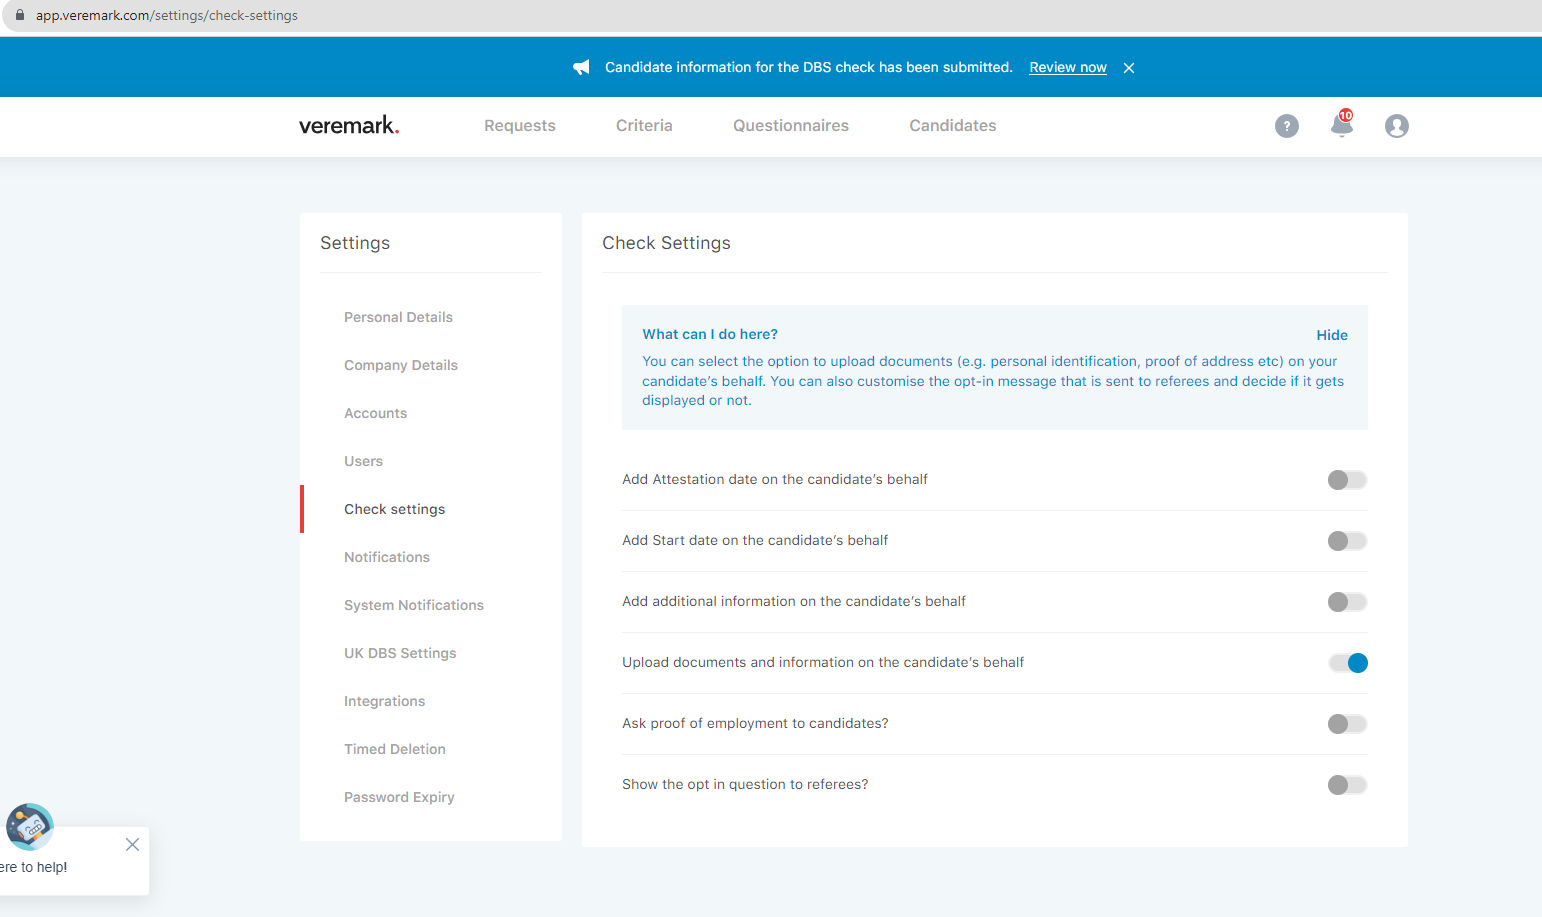
Before you can start uploading your important documents, you'll need to enable the document upload feature. This is a straightforward process:
-
Log in to Your Account: Begin by logging in to your Veremark account using your username and password.
-
Navigate to the Settings Page: Once you are logged in, look for the "Settings" option in your account dashboar, located in the upper right corner of the screen.
-
Go to "Check Settings": Within the "Settings" section, you will find a tab called "Check settings". Click on it.
-
Enable the Document Upload Feature: Inside the "Check Settings" page, you will see a toggle switch labeled "Upload documents and information on the candidate’s behalf". Turn this feature on by clicking the button. This step ensures that you can upload documents in the future.
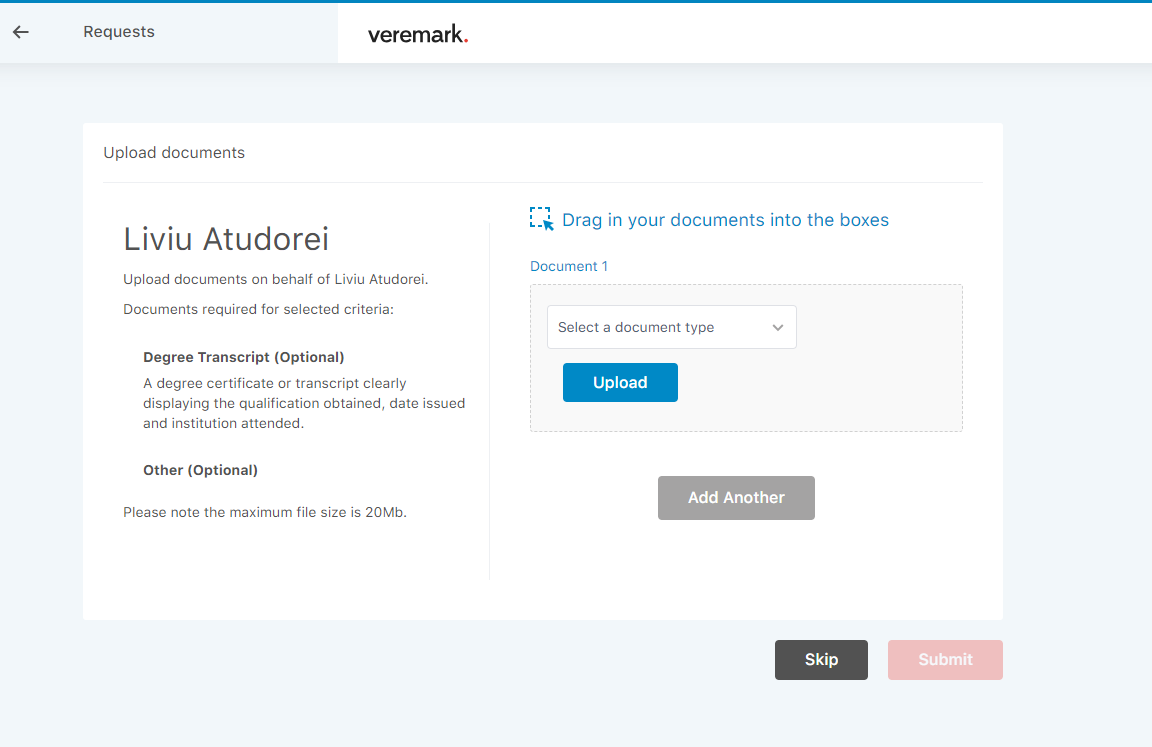
With the document upload feature enabled, you can easily submit your documents. Here's how:
-
Access the Upload Feature: After enabling the document upload feature, navigate to the the requests page amd click on the candidate request you need to submit your documents.

-
Choose Your Files: Click on the "Upload" button. This will open a file browser dialog that allows you to select the documents you want to upload from your computer.
-
Select the Documents: Browse your computer files and select the documents you wish to upload. You can select multiple files at once if needed.
-
Start the Upload: Once you've selected your documents, click the "Submit" button to initiate the upload process.