1. Initial setup
Veremark setup
-
First setup the Veremark account with the relevant criteria and checks that you want to order through Ashby.
-
Within Settings-> Integrations click on the Ashby icon to create and display the PartnerKey record (Fig.1).
- Copy that API Key, paste into your favourite notes app. This will be used in the next step within Ashby.

Ashby Setup
-
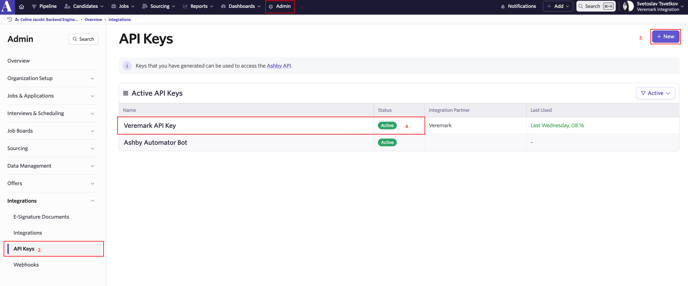
Next navigate to Admin -> API keys in Ashby. Generate the Ashby API key (Fig.2) by clicking the +New icon and selecting Veremark from the dropdown list of partners (Fig.3) and copy it.
-
Share the Ashby API key with your Veremark rep.

Configure Veremark integration in Ashby app. On the Ashby app go to the Admin panel and click Integrations on the side panel (Fig. 5). Search for Veremark and enter the Veremark API key in the box shown

That's it! All done, the two systems are connected. Now to order some checks...
2. Ordering Veremark checks in Ashby
Adding the background check in the Interview Plan
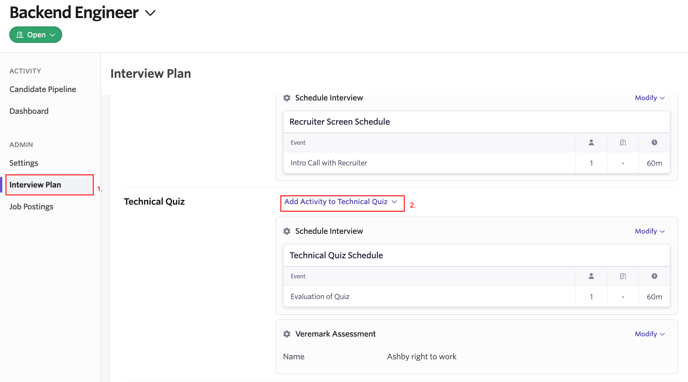
Navigate to the candidate pipeline for a role you are hiring for. You can decide on which step of the custom Interview plan to add the Veremark background checks (Fig. 7).
In step 2. of the image below the user can go into the recruitment role details.

Steps to add background check step into the Interview plan:
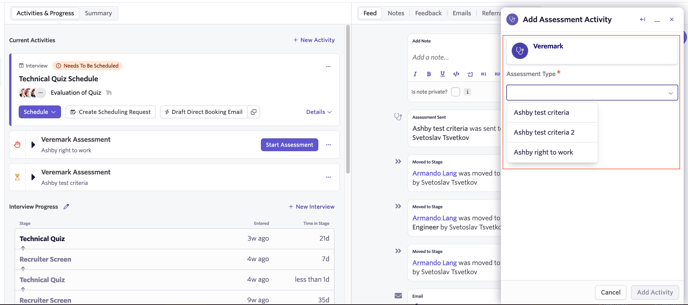
The screen below will be visible once the user follows the steps from Fig.7
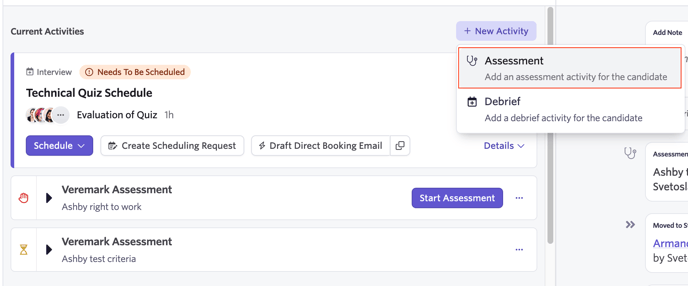
The assessment can be started from the candidate details page, over the step that was previously setup in the interview plan as a starting point of the background check (Fig.10)
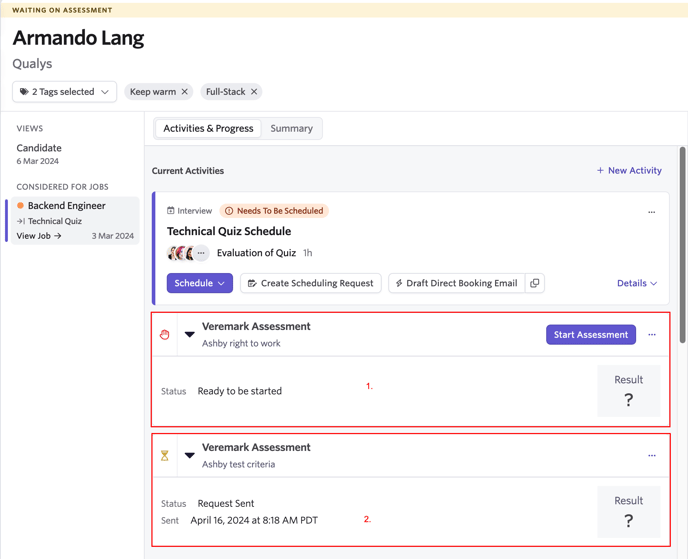
Once the background check process is finished in Veremark, the system automatically publishes the data on Ashby and you can see the results (Fig. 13).

The following can be seen:
-
When the overall status was changed and to what state it was changed
-
The result flag
-
The direct link to the report in the Veremark app
-
The date/time when the assessment data (report url and status) was sent to Ashby